
Background
A few years ago I proposed a new computer lab idea to my principal. Instead of purchasing all new equipment which would have costs ten-of-thousands of dollars, my proposal costs less than three thousand. Instead of standalone desktops or laptops, I used Raspberry Pi's and hand-me-down monitors, keyboard, and mice. The lab is fantastic, and it's capable of 97% of all the things that a traditional computer lab could do (assuming no proprietary software).
I didn't want students to lose their work or fight over which computer they were working on, so I decided to install PiNet, a project based on LTSP, which allows for network booting.
The only problem that I came across with PiNet was that students were not able to access the internet, even if the server was connected to the wifi and the wired network at the same time. I had to find a way to share the wifi with the Raspberry Pi's.
DHCP
A DHCP is needed on the server in order to hand out IP addresses to the Pi's. PiNet documentation has you use a router connected to your switch to act as a DHCP, but this won't allow you to share the wifi connection (at least I wasn't able to figure it out). This is how I installed the DHCP on the server and shared my wifi connection with the students' Pi's.
Install and Configure DHCP
First gather your network information with
Take note of what your wifi IP address because you don't want to chose an IP for your local network that conflicts with your wifi network. On my computer this the sections that's under wlps03. My IP starts with a 172.
Now install DHCP server.
After the install you need to configure the DHCP:
ifconfig
Take note of what your wifi IP address because you don't want to chose an IP for your local network that conflicts with your wifi network. On my computer this the sections that's under wlps03. My IP starts with a 172.
Now install DHCP server.
sudo apt-get install isc-dhcp-server
After the install you need to configure the DHCP:
sudo nano /etc/dhcp/dhcpd.conf

This is what you'll see
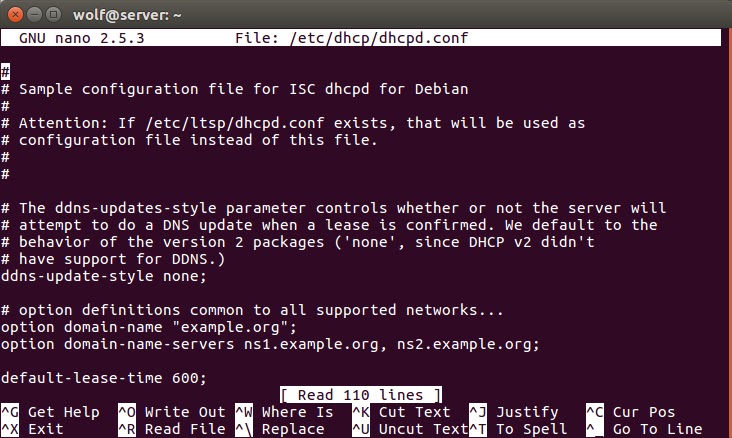
Uncomment the line that says "authoritative" then a little further down you'll configure your DHCP details.

Since my wifi IP starts with 172, I chose to use 192.168.... for my local network. Netmask of 255.255.255.0. The second line tells the DHCP which IP numbers to hand out. I chose .10 through .40 because I have 25 Pi's that need IP addresses, so I figured 30 IPs would be a good number.
Hit ctrl-o to save. You'll be prompted for the filename, just hit ENTER. Exit the program by hitting ctrl-x.
Next week need to set the IP address of the server. Go to the network manager for this.

Select the Wired Connection, and edit. Under IPv4 Settings set the method, "Shared to other computers", then click back on the Connection name and SAVE.

Upon going back to your PiNet main menu you'll see your new IP address. My IP is 10.41.0.1

Make sure you change the SD cards' so that the IP in cmdline.txt matches the IP at the top of the PiNet screen.
Boot and enjoy your wifi!
No comments:
Post a Comment